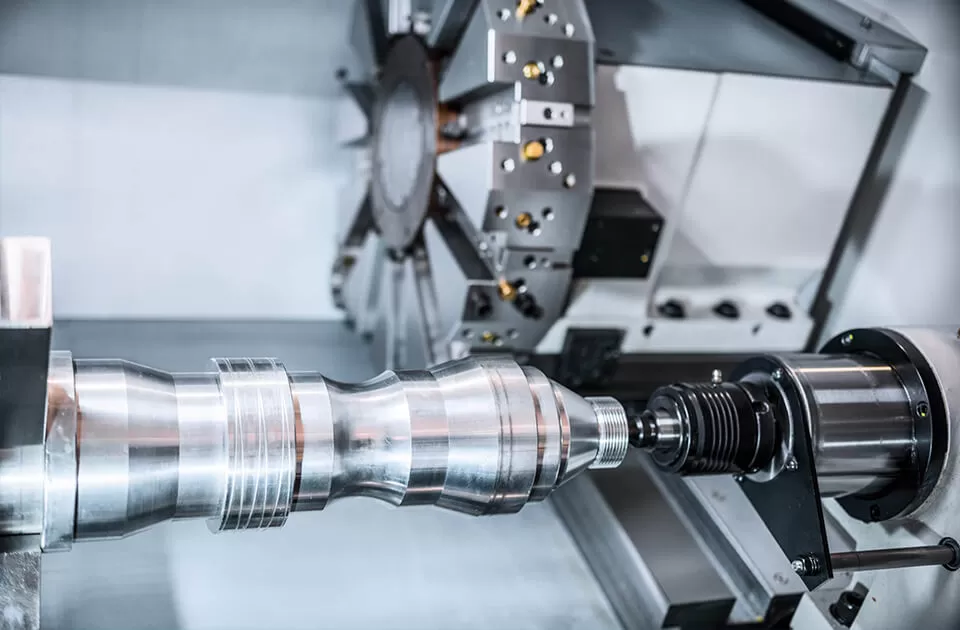
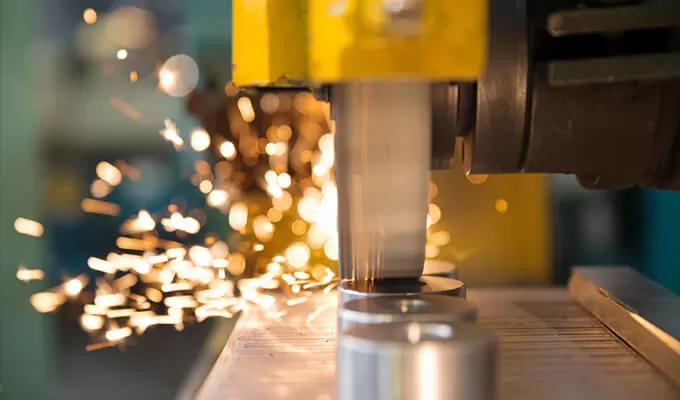
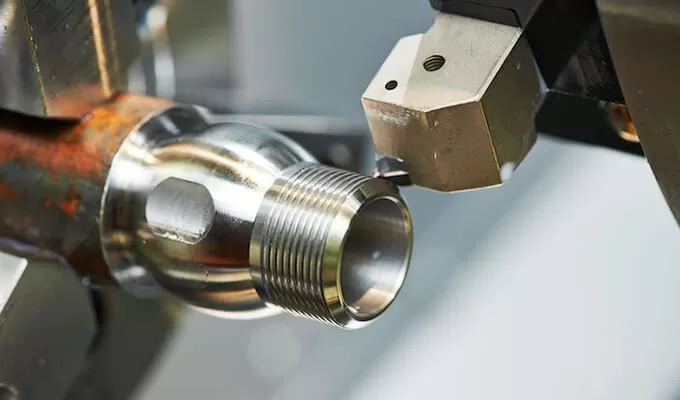
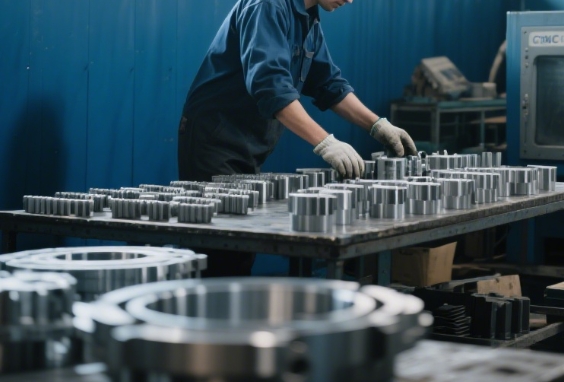
Gold, a precious metal known for its luster and durability, has fascinated humanity for centuries. One of its most intriguing properties is its melting point, which plays a critical role in its applications across industries. Whether you're a jewelry maker, an industrial engineer, or a custom machining company specializing in precise machining and manufacturing, understanding gold's melting point is essential. This article explores the science behind gold's melting point, its significance, and its applications in CNC and precision machining.
Gold's melting point is 1,064°C (1,947°F), a relatively high temperature compared to other metals. This property makes gold highly resistant to heat, ensuring its stability in various environments. The melting point is a key factor in determining how gold behaves during processing, whether in jewelry making or industrial applications.
In jewelry making, gold's melting point determines how it can be shaped, cast, and alloyed with other metals. For example, 24-karat gold, which is pure gold, melts at 1,064°C, while alloys like 18-karat gold (75% gold) have slightly lower melting points due to the presence of other metals like copper or silver
In industries, gold's high melting point makes it ideal for applications requiring thermal stability, such as electronics and aerospace components. Its ability to withstand high temperatures without degrading ensures reliability in critical systems
Pure 24-karat gold has a melting point of 1,064°C (1,947°F). This high melting point is due to the strong metallic bonds between gold atoms, which require significant energy to break. Pure gold is rarely used in its pure form due to its softness, but its melting point remains a benchmark for gold alloys.
The melting point of gold alloys varies depending on their karat purity. For example:
Table 1: Melting Points of Gold Alloys
Karat Purity | Gold Content | Melting Point |
24K | 99.9% | 1,064°C (1,947°F) |
18K | 75% | ~930°C (1,706°F) |
14K | 58.3% | ~880°C (1,616°F) |
The addition of metals like copper, silver, or zinc lowers the melting point, making alloys easier to work with in CNC and precision machining.
Measuring gold's melting point requires specialized equipment like a thermocouple or a melting point apparatus. These tools ensure accurate temperature readings, which are crucial for processes like refining and alloying. For custom machining companies, precise temperature control is essential to maintain the integrity of gold components.
Gold refining involves melting gold to separate impurities and enhance its purity. Techniques like the Miller process and the Wohlwill process are used to achieve 99.99% pure gold. These methods rely on precise temperature control to minimize material loss and ensure high-quality output.
Historical Significance: Ancient civilizations used gold's melting point to create coins and artifacts, showcasing their metallurgical skills.
Space Applications: Gold's high melting point makes it suitable for spacecraft components exposed to extreme temperatures.
Conductivity: Despite its high melting point, gold remains an excellent conductor of electricity, making it invaluable in electronics
FAQ
What is the melting point of gold?
The melting point of pure gold is 1,064°C (1,947°F).
How does the melting point of gold vary in different gold alloys?
The melting point decreases as the gold content in the alloy decreases. For example, 18-karat gold melts at ~930°C (1,706°F).
Why is the melting point of gold important?
It determines how gold can be processed and used in applications ranging from jewelry to industrial components.
How is the melting point of gold measured?
Specialized tools like thermocouples or melting point apparatuses are used to measure gold’s melting point accurately.
What historical significance does the melting point of gold hold?
Gold's melting point enabled ancient civilizations to create durable coins and artifacts, showcasing their advanced metallurgical knowledge.
How does the gold melting and refining process work?
Refining processes like the Miller and Wohlwill methods use precise temperature control to separate impurities and enhance gold’s purity.
What are some interesting facts about the melting point of gold?
Gold's high melting point makes it suitable for space applications, and its conductivity ensures its use in electronics.
Gold's melting point is a defining property that influences its applications across industries. From jewelry making to CNC and precision machining, understanding this property is crucial for achieving high-quality results. For custom machining companies and manufacturers, mastering gold’s melting behavior opens doors to innovative designs and reliable products. Whether you're refining gold or crafting intricate components, gold’s unique properties make it a timeless material of choice.
In the world of automotive manufacturing, precision and reliability are not just goals, they are requirements. The complex machining and assembly of automotive components demands exacting standards and consistency, which is where jigs and fixtures come into play. These tools are integral to maintaining quality and efficiency across the production line.
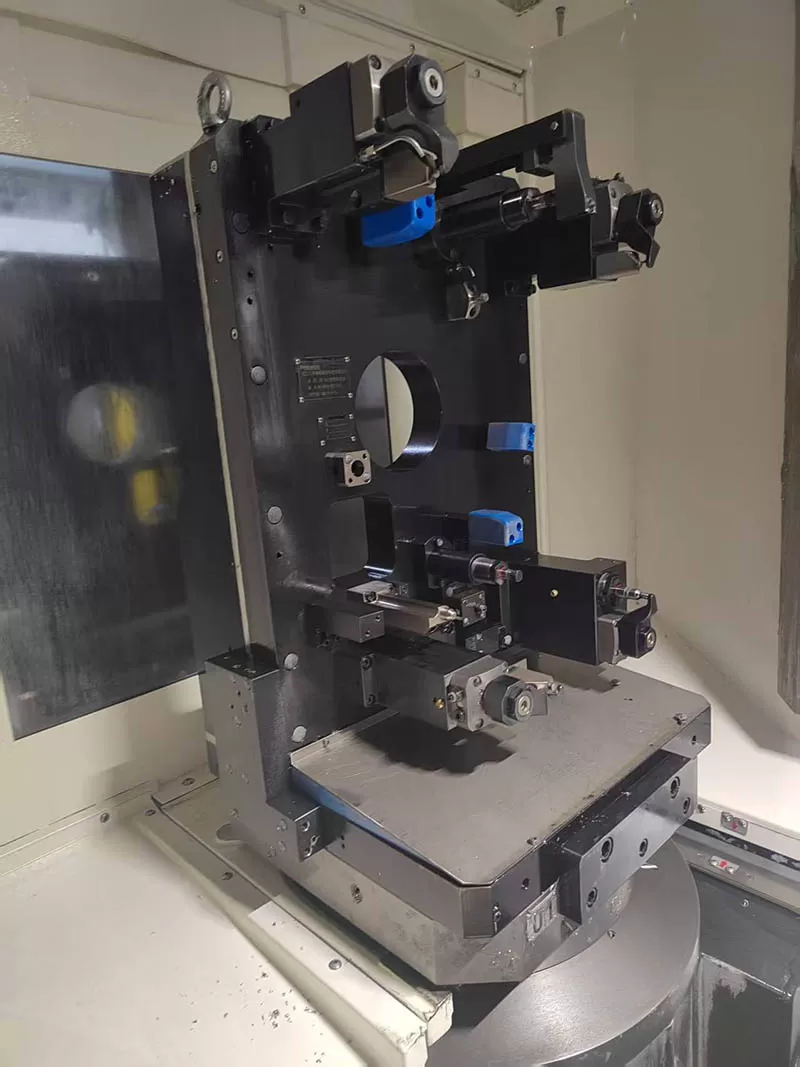
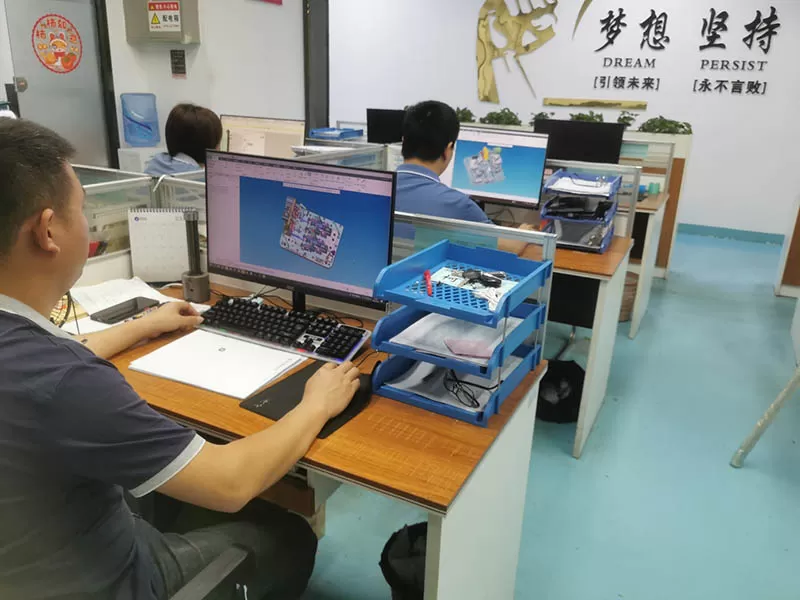
ANOK’s CNC machining division employs experienced tooling engineers for its machining fixture design. To fully utilize our precision parts and assemblies business, ANOK must produce hundreds of custom designed machining fixtures every year. A well designed fixture is part of a successful precision parts manufacturing business line. If you are contacting ANOK for precision parts and fixtures, your job will certainly be reviewed by a machining fixture design engineer and make out a customized solution according to your demands.
Consistency: In drilling and machining operations, jigs ensure that holes and features are consistently placed according to design specifications. This minimizes defects and reduces the need for rework, which is crucial for maintaining production efficiency and product quality.
Productivity: Fixtures hold parts securely during machining, allowing for faster processing times. By reducing movement or vibration that could affect part quality, fixtures help in increasing the throughput of the manufacturing process.
Alignment: Fixtures play a vital role in aligning and holding parts in place during welding or assembly. Accurate alignment ensures that components fit together correctly, which is essential for maintaining the structural integrity and performance of the final product.
Repeatability: Using fixtures in assembly processes allows for consistent and repeatable results. This is especially important in mass production, where uniformity is critical for meeting quality standards and customer expectations.
Accuracy: Jigs and fixtures are used in quality control processes to hold parts steady during measurement and inspection. This ensures that parts meet design specifications and are free from defects.
Testing: Some jigs are designed to simulate operational conditions for testing components before they are used in vehicles. This helps in identifying potential issues and ensuring that parts will perform reliably under real-world conditions.
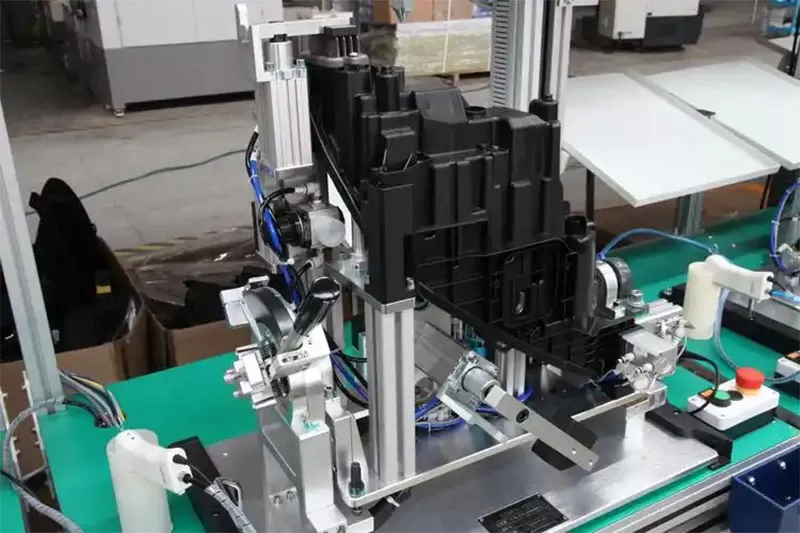
Assembly fixtures are instrumental in the production of automobiles. They are designed to securely hold components during the assembly process, facilitating precise alignment and reducing errors. Assembly fixtures enable your skilled technicians to efficiently assemble various parts, ensuring consistent quality and minimizing assembly time. By utilizing assembly fixtures, we optimize productivity, maintain high-quality standards, and deliver vehicles that exceed customer expectations.
ANOK PRECISION understand that vehicle assembly is a critical part of the automotive manufacturing and requires precision. Be it gap gauges or taper wedges and logo mounting tools, we ensure that our products are highly functional and precise. We undertake a methodical process - site visits, designing upon client inputs, manufacturing, and quality controls. We also implement what we call reverse engineering – manufacturing tools based on samples provided by the client.
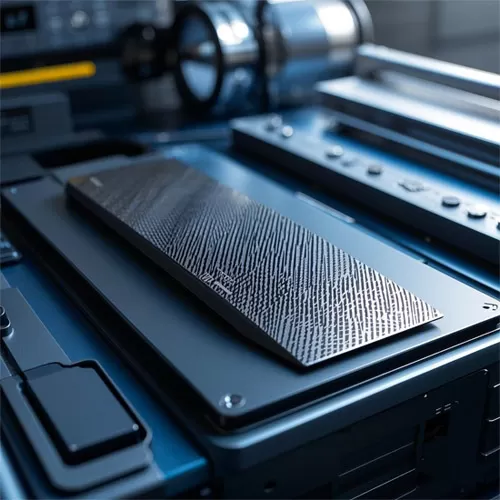
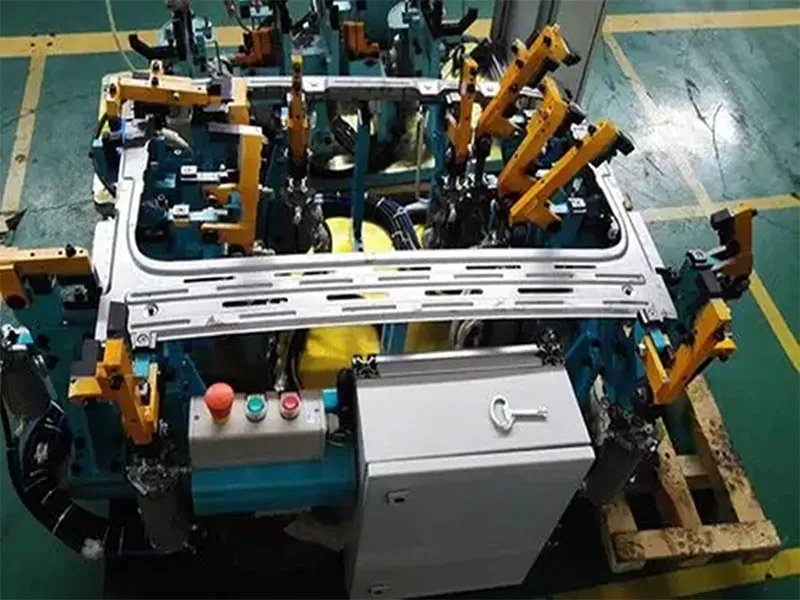
Welding fixtures are essential for joining metal components in the automobile manufacturing process. These fixtures hold the parts firmly in place, ensuring accurate alignment during welding operations. By utilizing welding fixtures, we achieve consistent weld quality, minimize distortion, and enhance the overall structural integrity of your vehicles. Moreover, welding fixtures provide a safe work environment by reducing the risk of accidents, ensuring the well-being of our workforce.
ANOK PRECISION manufactures welding fixtures that highly ensure correct positioning and orientation or workpieces. Our sturdy products help you weld accurately and consistently, enabling all your products remain uniform and interchangeable.
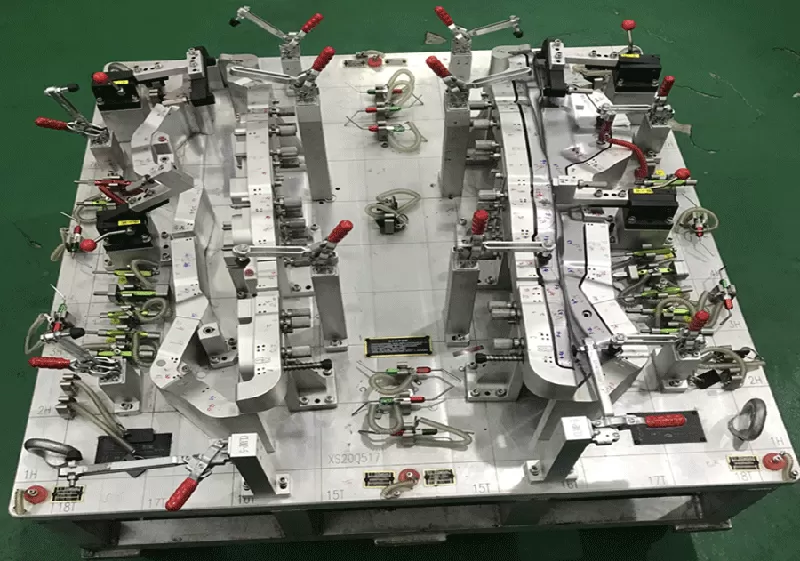
Inspection fixtures play a critical role in quality control throughout the manufacturing process. These fixtures are used to verify the accuracy and precision of components and assemblies. With inspection fixtures, your quality control team can perform rapid and accurate measurements, ensuring that every part meets the specified tolerances and standards. By integrating inspection fixtures into your manufacturing process, you can enhance quality assurance, minimize defects, and deliver vehicles of unmatched quality.
ANOK PRECISION utilizes its strength and infrastructure to manufacture precision gauges and inspection fixtures for the automotive industry. These fixtures enable you to check the position of holes and its dimensions, profile tangency of the surface and shrinkage of parts. Our gauges too are widely used to measure different types of objects having various sizes, shapes, and thicknesses, the gap in space, critical diameter of holes etc.
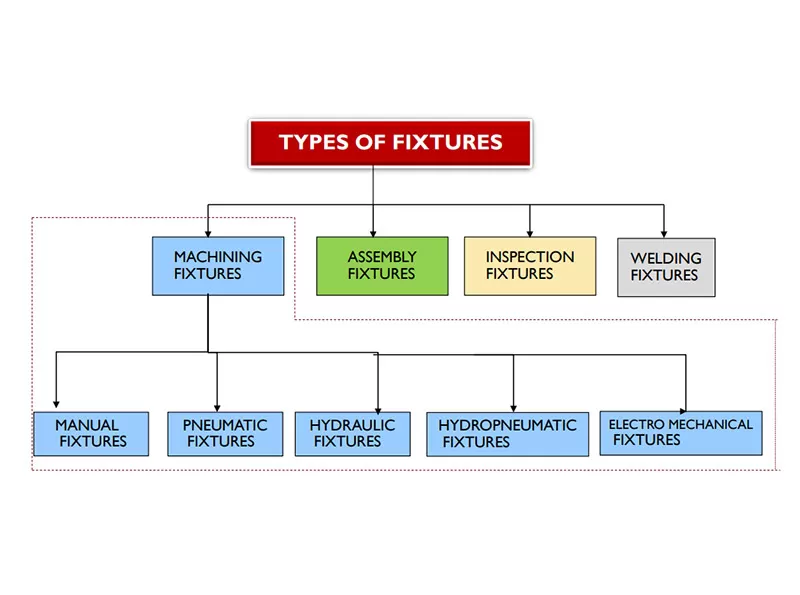
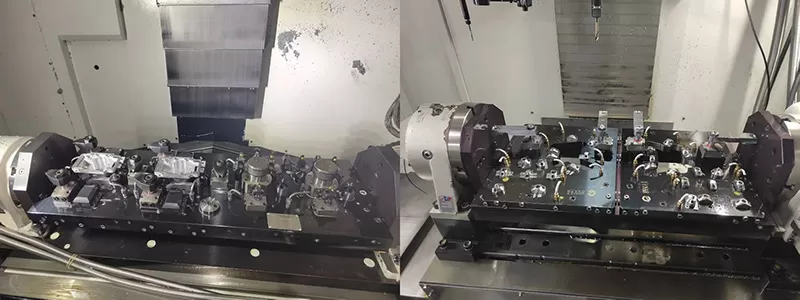
Machining fixtures& jigs are indispensable in precision machining operations such as milling, drilling, and grinding. These fixtures securely hold the workpiece, ensuring stability, precision, and repeatability. By utilizing machining fixtures, we optimize our machining operations, reduce cycle times, and achieve consistent dimensional accuracy in our components. This allows us to meet tight tolerances and deliver parts that are critical to the performance and reliability of our vehicles.
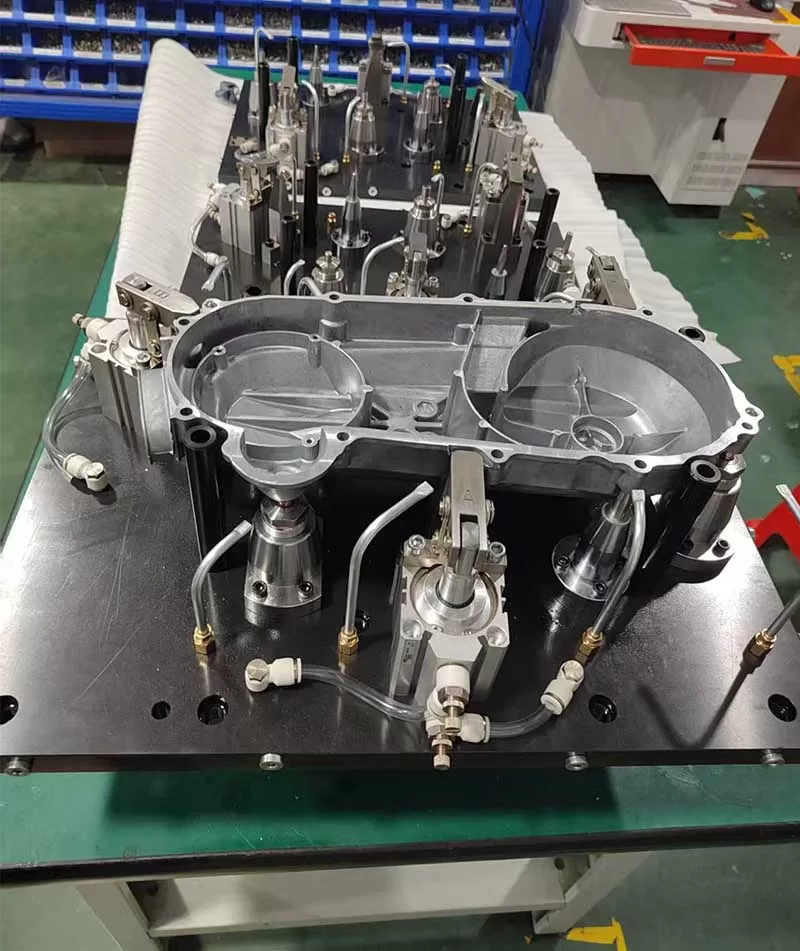
Fixtures are used for holding & locating the parts in precision machining process mainly in VMC, jig boring, HMCs, rotary and surface grinding. According to your production demands, there can be Manual clamp machining fixture, Hydraulic clamp machining fixture, Pneumatic clamp machining fixture ,est. ANOK PRECISION manufactures machining fixtures for various components in automotive and non-automotive industry.
In the assembly of the complete fixture, countless parts that have been standardized on the market are required. At ANOK PRECISION, we guarantee that all standard components are as requested by our customers. In order to ensure the stability of the fixture in production, all cylinders are used industry well-known brands, such as:
KOSMEK https://www.kosmek.co.jp/english/index.html
ROEMHELD https://www.roemheld.de/en
PASCAL https://www.pascaleng.co.jp/us/
Keeping tooling design in-house is an enormous benefit to our precision parts and assemblies customers. Being vertically integrated means having an internal supply chain of metal machining components to feed our contract manufacturing customers. From design to modular fixtures, ANOK’s team is ready to support you by our capability and expertise:
Cost control and efficiency: We have complete advanced machining equipment, such as 4axisCNC, 5axisCNC, Grinding, WEDM, which can fully meet the machining parts production of all fixtures in manufacturing, and can effectively adjust the processing schedule to meet the time needs
Accuracy guarantee: According to assembly requirements and many years of processing experience, leave enough assembly gap between parts and parts
Material optimization: Analyze the actual needs of customers and years of industry experience, select the best cost-effective materials and surface treatment for the components
Quality control: Strict quality control process and testing means to ensure that each fixture meets customer high standards
ANOK PRECISION is constantly improving our machining department as we continue to expand and reinvest into our organization. For the most up to date information on our capabilities, please visit our Service Page.
ANOK PRECISION: Expertise in Jigs, Fixtures, and Beyond
At ANOK PRECISION MANUFACTURING (SHENZHEN) Co.,Ltd, we understand the critical role that jigs and fixtures play in automotive manufacturing. Our expertise extends beyond just the design and implementation of these tools. We provide a comprehensive suite of services that includes:
· Advanced Tooling Solutions: We offer custom-designed jigs and fixtures tailored to meet the specific needs of your manufacturing processes, ensuring precision and efficiency.
·
· Prototyping and Simulation: Our state-of-the-art CAD and simulation capabilities allow for thorough testing and refinement of jigs and fixtures before full-scale production.
·
· Maintenance and Support: We provide ongoing support and maintenance services to ensure that your jigs and fixtures remain in top condition, helping to prevent downtime and maintain high-quality production standards.
For more information about how ANOK PRECISION MANUFACTURING (SHENZHEN) Co.,Ltd can support your automotive manufacturing needs, including our jigs and fixtures solutions and other services, please visit our website at www.anokcnc.com .
Reference:
1,Book 《JIGS AND FIXTURES 》– HIRAM E. GRANT
Iron is one of the most abundant and versatile metals on Earth, playing a pivotal role in industries ranging from construction to manufacturing. Its unique properties, such as strength, durability, and adaptability, make it indispensable in modern society. This article delves into the various types of iron—wrought iron, cast iron, pig iron, pure iron, and steel variants like carbon steel, stainless steel, tool steel, and alloy steel. Understanding these types is essential for industries like custom machining companies specializing in precise machining and manufacturing, as well as those involved in CNC and precision machining.
Iron is a fundamental element in the periodic table, known for its strength, magnetic properties, and ability to form alloys. It has been used by humans for thousands of years, from ancient tools to modern skyscrapers. Today, iron and its alloys are critical in construction, automotive manufacturing, household items, and advanced machining processes. Its versatility and abundance ensure its continued relevance in industrial and technological advancements.
Characteristics
Low carbon content (less than 0.08%)
Highly ductile and malleable
Resistant to corrosion due to its fibrous structure
Easily welded and forged
Uses
Ornamental structures (e.g., gates, fences, and railings)
Historical restoration projects
Decorative furniture and art pieces
Characteristics
High carbon content (2-4%)
Brittle but excellent compressive strength
Good wear resistance
High melting point
Uses
Engine blocks and machinery parts
Pipes and pipe fittings
Cookware (e.g., skillets and pans)
Architectural elements (e.g., columns and facades)
Characteristics
High carbon content (3.5-4.5%)
Brittle and not suitable for direct use
Primary product of iron smelting
Uses
Raw material for steel production
Manufacturing of cast iron products
Foundry applications
Characteristics
Nearly 100% iron content
Soft and malleable
Low tensile strength
Highly magnetic
Uses
Laboratory experiments
Magnetic cores for electrical devices
Specialized industrial applications
Characteristics
Alloy of iron and carbon (carbon content typically 0.05-1.5%)
High strength and durability
Versatile and customizable
Uses
Construction materials (e.g., beams, rebar, and frameworks)
Automotive components (e.g., chassis, engine parts)
Tools and machinery
Characteristics
Contains chromium (10-20%) for corrosion resistance
High strength and durability
Aesthetic appeal
Uses
Kitchen appliances and utensils
Medical instruments
Architectural structures
Characteristics
High hardness and wear resistance
Contains tungsten, molybdenum, and vanadium
Excellent heat resistance
Uses
Cutting and drilling tools
Molds and dies
Precision machining components
Characteristics
Contains additional elements like nickel, chromium, and manganese
Enhanced strength, toughness, and corrosion resistance
Customizable for specific applications
Uses
Aerospace components
Industrial machinery
High-performance automotive parts
Type of Iron | Carbon Content | Strength | Ductility | Common Uses |
Wrought Iron | <0.08% | Moderate | High | Ornamental, decorative |
Cast Iron | 2-4% | High (compressive) | Low | Machinery, cookware |
Pig Iron | 3.5-4.5% | Low | Low | Steel production, foundries |
Pure Iron | ~0% | Low | High | Electrical, laboratory |
Carbon Steel | 0.05-1.5% | High | High | Construction, automotive |
Stainless Steel | 0.03-1.2% | High | Moderate | Appliances, medical tools |
Tool Steel | 0.5-1.5% | Very High | Low | Cutting tools, molds |
Alloy Steel | 0.1-1.5% | High | Moderate | Aerospace, machinery |
Construction
Iron and its alloys are the backbone of modern construction. Steel beams, rebar, and frameworks provide the structural integrity needed for skyscrapers, bridges, and infrastructure projects.
Automotive Industry
From engine blocks to chassis components, iron and steel are essential in manufacturing durable and reliable vehicles.
Household Items
Iron is found in everyday items like cookware, tools, and appliances, showcasing its versatility and practicality.
Summary of Key Points
Wrought iron is ductile and corrosion-resistant, ideal for decorative and ornamental uses.
Cast iron is strong and wear-resistant, commonly used in machinery and cookware.
Pig iron is a raw material for steel production and foundry applications.
Pure iron is soft and magnetic, suited for specialized applications.
Carbon steel is versatile and durable, making it the go-to material for construction and automotive industries.
Stainless steel offers corrosion resistance and aesthetic appeal, ideal for appliances and medical tools.
Tool steel is hard and wear-resistant, perfect for cutting tools and molds.
Alloy steel provides enhanced properties for high-performance applications in aerospace and machinery.
Final Thoughts on the Importance of Understanding Different Types of Iron
Understanding the properties and applications of different types of iron is crucial for industries like construction, automotive, and CNC and precision machining. For custom machining companies and manufacturers, selecting the right type of iron ensures optimal performance, durability, and cost-effectiveness. By leveraging the unique characteristics of each type, businesses can innovate and excel in their respective fields.
Iron remains a cornerstone of modern industry, and its adaptability continues to drive progress across the globe. Whether you're crafting intricate components or building towering structures, iron's versatility makes it an indispensable material.
CNC (Computer Numerical Control) machining has revolutionized manufacturing, enabling the production of complex parts with unparalleled precision and efficiency. At the heart of this technology lies CNC POR (Power-On Reset), a critical feature that ensures the reliability and accuracy of CNC systems. This article delves into the fundamentals of CNC POR, its applications across industries, and its future potential, while providing a comparative analysis with other CNC technologies.
CNC POR (Power-On Reset) is a mechanism that initializes CNC systems to a predefined state when powered on. It clears residual data, resets system parameters, and ensures the machine starts operations with a clean slate. This process is vital for maintaining accuracy, preventing errors, and ensuring safety in CNC machining.
The CNC POR process involves several key steps:
Power-On Detection: The system detects the power-up event and triggers the reset sequence.
System Reset: Critical components like the CPU, memory, and I/O interfaces are reset to their default states.
Parameter Initialization: Predefined settings, such as tool offsets and axis positions, are loaded.
Self-Test and Diagnostics: The system performs checks to ensure all components are functioning correctly.
Ready State: The machine enters a safe and operational state, ready for machining tasks.
CNC POR ensures the high precision required for aerospace components, such as turbine blades and structural parts.
Table 1: CNC POR Applications in Aerospace
Component | Role of CNC POR |
Turbine Blades | Ensures tight tolerances for aerodynamic efficiency |
Structural Parts | Maintains dimensional accuracy for safety |
Engine Components | Reduces errors in high-stress environments |
In the automotive industry, CNC POR supports the production of engine parts, transmission components, and custom designs.
Table 2: CNC POR Applications in Automotive
Component | Role of CNC POR |
Engine Blocks | Ensures precise machining for performance |
Transmission Gears | Maintains consistency in high-volume production |
Custom Machined Parts | Enables complex geometries for unique designs |
CNC POR plays a crucial role in manufacturing medical devices, such as implants and surgical instruments, where precision is non-negotiable.
Table 3: CNC POR Applications in Medical
Component | Role of CNC POR |
Surgical Instruments | Ensures sharpness and accuracy for delicate procedures |
Implants | Maintains biocompatibility and fit |
Diagnostic Equipment | Reduces errors in critical measurements |
CNC POR excels in maintaining tight tolerances and handling complex geometries, outperforming traditional CNC methods.
Table 4: Precision and Complexity Comparison
Technology | Precision | Complexity Handling |
CNC POR | High | Excellent |
Traditional CNC | Moderate | Good |
Manual Machining | Low | Limited |
CNC POR enhances efficiency by reducing setup times and minimizing errors during power cycles.
Table 5: Efficiency and Speed Comparison
Technology | Efficiency | Speed |
CNC POR | High | Fast |
Traditional CNC | Moderate | Moderate |
Manual Machining | Low | Slow |
CNC POR supports a wide range of materials and applications, making it highly versatile.
Table 6: Versatility Comparison
Technology | Material Range | Application Scope |
CNC POR | Broad | Extensive |
Traditional CNC | Moderate | Broad |
Manual Machining | Limited | Narrow |
The CNC POR market is expected to grow significantly, driven by advancements in automation and Industry 4.0.
Table 7: CNC POR Market Growth
Year | Market Size (USD Billion) |
2025 | 5.2 |
2030 | 8.7 |
2035 | 12.4 |
CNC POR is set to expand into new industries, including renewable energy and electronics.
Table 8: CNC POR Industry Applications
Industry | Potential Applications |
Renewable Energy | Wind turbine components, solar panel frames |
Electronics | Precision parts for semiconductors |
Robotics | Custom machining for robotic arms |
While CNC POR offers immense potential, challenges like high initial costs and technical complexity must be addressed.
Table 9: CNC POR Opportunities and Challenges
Opportunities | Challenges |
Increased Automation | High Initial Costs |
Enhanced Precision | Technical Complexity |
Broader Applications | Skilled Labor Shortage |
CNC POR offers numerous advantages, including improved precision, efficiency, and versatility.
Table 10: Advantages of CNC POR
Advantage | Description |
High Precision | Ensures tight tolerances and accuracy |
Enhanced Efficiency | Reduces setup times and errors |
Broad Material Range | Supports metals, plastics, and more |
Despite its benefits, CNC POR has limitations, such as high costs and technical requirements.
Table 11: Limitations of CNC POR
Limitation | Description |
High Initial Costs | Expensive setup and maintenance |
Technical Complexity | Requires skilled operators |
Limited Flexibility | Less adaptable to small-scale projects |
CNC POR is a cornerstone of modern CNC machining, enabling precision, efficiency, and versatility across industries. As technology advances, its applications will continue to expand, offering new opportunities while addressing existing challenges. For businesses seeking precise machining and manufacturing solutions, partnering with a custom machining company like Anok CNC ensures access to cutting-edge CNC and precision machining technologies.
By understanding the role of CNC POR, manufacturers can unlock the full potential of CNC machining, driving innovation and excellence in their operations.
Computer Numerical Control (CNC) machines have revolutionized the manufacturing industry, improving product quality, operational efficiency, and reliability. This technology has become immensely popular, and it is expected that by 2028, the global CNC machine market size will reach $140.78 billion, with a compound annual growth rate of 7.1%. Like any other technology, these manufacturing powerhouses can encounter malfunctions and other issues. Without proper knowledge, these relatively minor issues can have far-reaching impacts.
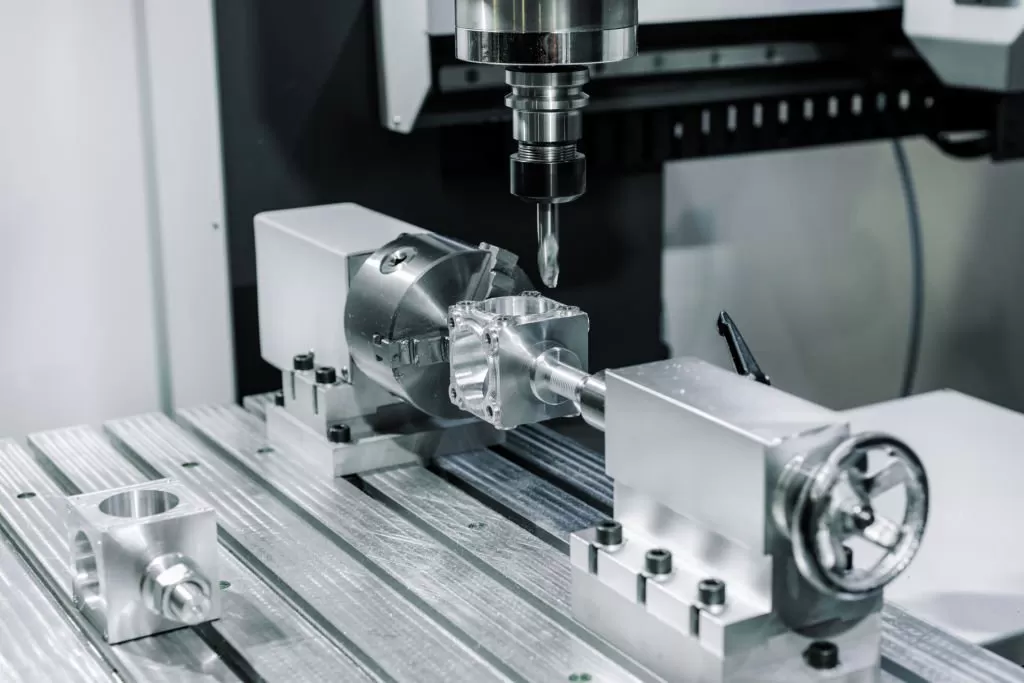
CNC machining is a form of automated manufacturing that uses precise tools (rotating tools on a spindle (CNC mills) or fixed tools against rotating raw materials (CNC lathes)) to create complex parts. The spindle's role is to provide the necessary rotational motion for accurate material removal. Additionally, CNC machining is an omnipresent force within the manufacturing industry, particularly crucial in sectors that rely on metal and plastic production.
These machines utilize carefully crafted algorithms designed by engineers to send precise instructions to the machine tools, orchestrating their movements and managing auxiliary processes. This crucial process empowers precision cnc machining and the skilled machinists who oversee it, allowing them to deliver unparalleled versatility, efficiency, and precision. This capability extends from the manufacture of tiny electronic components to the production of vast aircraft and aerospace parts.
Common problems with CNC machines can have serious consequences. Errors might seem trivial, but if not detected in time, they can cause significant damage to tools and machines. These issues can reduce the lifespan of the machine and affect productivity, leading to replacement costs or significant downtime. Over time, they can lead to complete failures.
Identifying and addressing common machine issues can extend the lifespan of CNC machines. Predictive and proactive maintenance can also reduce downtime, keeping our machining tools in optimal working condition, thereby improving overall efficiency. The most common CNC machine problems include the following seven aspects:
1. Code Errors
Computer-driven machines rely on complex code, and programming is one of the most common mistakes machine operators encounter. These errors can be caused by incorrect variables inputted into the program, wrong settings, or a lack of understanding of different G and M computer codes.
These issues can be difficult to detect, especially if employees lack experience. Many people will immediately look at the machine and overlook that the problem might originate from the computer. Wasted time, materials, and machine damage can result in high costs and slow operations.
2. Lack of Maintenance
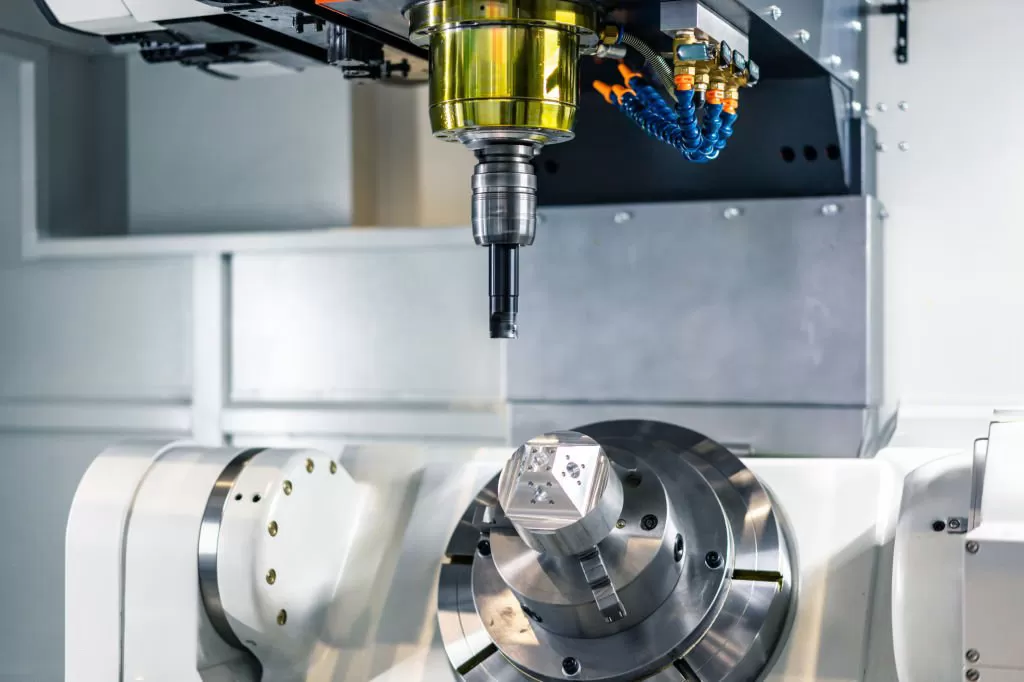
CNC machines, such as 5 axis cnc machine, consist of many moving mechanical systems that must work within extremely tight tolerance requirements to ensure product quality. The slightest error, wear, or debris can severely impact machine performance, causing jams or permanent damage. Over time, dirt and debris will accumulate, and small errors will become more significant, eventually leading to machine failure.
Material movement, overheating, and noise during the cutting process are common signs of issues with CNC machines. The most common signs of overdue maintenance include slight machine errors, such as surfaces that do not meet standards or barely meet standards.
3. Vibration or Humming
Vibration during operation can shorten the tool's lifespan, affecting its durability and long-term functionality. Chatter and vibration can impact the machine's work efficiency and cost-effectiveness. If the operator discovers any unusual noise or vibration, they should identify the source of the vibration and take necessary measures to resolve the issue.
However, machine vibration often exists long before it is noticed by the human ear. Modern maintenance practices include regular monitoring of vibration and ultrasonic frequencies to detect minor performance defects.
4. Chuck Clamping Issues
Failure to clamp the workpiece securely on the machine is another common mistake in CNC machining. Incorrect clamping can lead to issues such as deviation, chatter, or deformation, causing damage to the machine or workpiece. If the chuck cannot hold the workpiece securely, a replacement might be necessary. This problem can be more severe than damaging workpieces or tools. Improper clamping of machine parts can cause accidents and injure operators, affecting the entire operation's safety.
5. Incompatible Power Supply
If an operator finds performance issues with the machine, it could be due to a problem with the power supply. The power supply must always provide the correct voltage to the input end. The output end must also work correctly to ensure the machine gets enough power. Machines with insufficient power need to work longer to achieve the same effect, leading to tool failure or workpiece damage. Excessive power can damage the machine, even causing complete failure.
6. Improper Tools or Settings
Incorrect cutting tools can affect the quality of material processing. Pay attention to tool marks on the edges and corners of materials, rough edges, or burn marks. Repeated use of improper tools or settings can cause severe tool wear. Dull tools and incorrect speed ratios can also result in rough material surfaces.
7. Overheating
Overheating is a common issue in large-volume and long-term machining. Spindle overheating is usually caused by an unclean machine and inadequate airflow. Environmental temperature can typically cause overheating, affecting work quality, tools, and the machine. A typical CNC machine should maintain a stable temperature range to prevent adverse effects.
While it can sometimes be challenging to avoid issues when operating complex machinery, supervisors can take specific measures to minimize unnecessary damage and malfunctions. Preventative methods can save time and money, avoiding unnecessary downtime, repairs, and replacements. Taking the following steps can minimize the impact of common errors and maintain the machine's lifespan:
Prioritize Operator Training: Human errors are common in production, whether it's choosing the wrong tool or data entry mistakes. Ensure operators receive extensive training and user manuals, and let experienced operators guide them until they are familiar with the relevant settings and protocols.
Develop a Preventative Maintenance Plan: CNC machines, for example, steel cnc machine, require regular cleaning and maintenance. Develop a detailed maintenance plan and ensure the team records any repairs to keep a comprehensive record of each machine's issues. Operators should routinely inspect the machines, ensure coolant levels are sufficient, and identify signs of wear.
Conduct Vibration Analysis: Vibration analysis allows machine maintenance experts to monitor machine vibration data and detect potential issues. It can detect bearing faults, shaft bending, misalignment, loose components, and more. If an operator is concerned about vibration issues, consult a professional to help identify the root cause.
Monitor the Environment: Environmental factors are an essential part of efficient CNC machine operation. Monitor temperature, humidity, noise, and power fluctuations to ensure the machine has an efficient operating environment.
Calibrate Machines: Regular calibration maintains the machine's accuracy and reliability. Follow the manufacturer's guidelines and have experts regularly inspect the machine, addressing small issues before they become significant problems.
Machine issues and operator errors can lead to significant operational losses. Partnering with experienced, reliable machine experts can minimize these problems through comprehensive after-sales service and trustworthy guidance on proper setup, programming, and maintenance. These professionals can also advise on whether to repair or replace equipment, thereby extending uptime and machine lifespan.
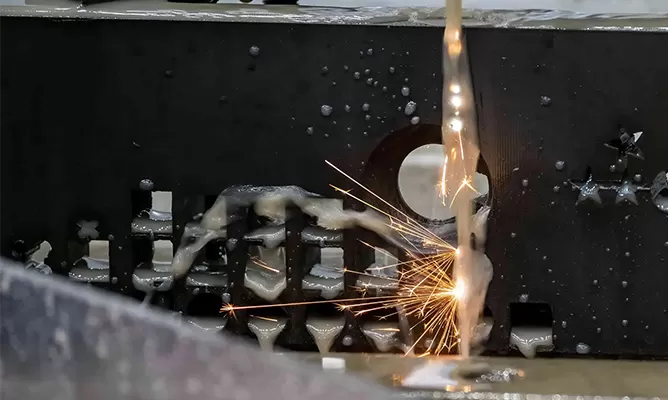
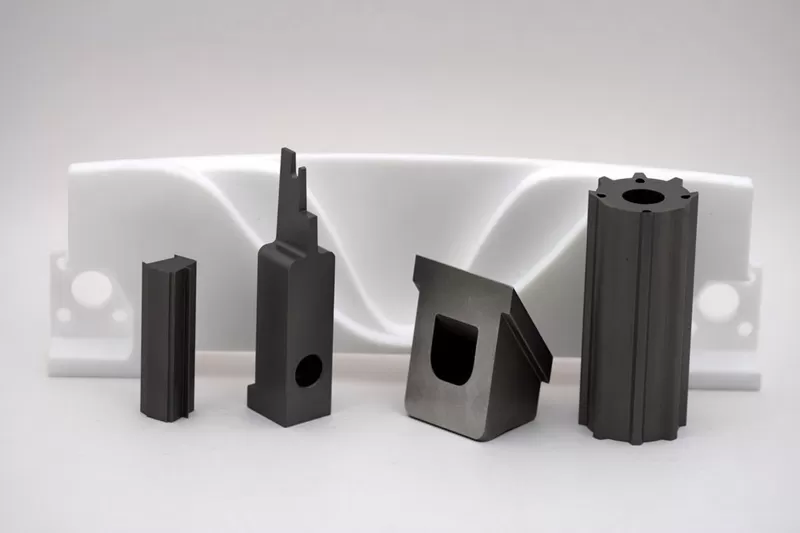
EDM has two main types: traditional or plunge EDM, and wire or wire-cut EDM. As mentioned above, traditional EDM uses a tool to disperse an electric current. The tool (cathode) moves along a metal piece (anode) and melts or vaporizes the metal through the current response. Due to the dielectric fluid, usually a hydrocarbon oil, both the cathode and the workpiece are immersed in it, which flushes away the tiny debris generated during the process. Wire EDM (or WCEDM) releases charged current through a thin wire under tension, acting as the cathode and guiding along the desired cutting path or cut. In this case, the dielectric fluid (usually deionized water) flushes through the cut during cutting, once again helping to remove particles and control sparks. The thin metal wire allows for precise cuts with narrow kerfs (usually about 0.015 inches, which offers fine cuts) and tolerances of about +/- 0.0001 inches. This high precision allows for complex three-dimensional cuts and produces highly precise punches, dies, and stripper plates.
As a trusted and professional custom precision machining factory in China, our Wire EDM equipment is operated by computer numerical control (CNC) devices that can control the wire on three-dimensional axes to provide greater flexibility. Simple cuts are accomplished by changing the tool's x-y coordinates, while more complex cuts are achieved by adding motion axes to the wire guide rails. Four-axis and five-axis wire EDM machines and services are available. Traditional EDM cannot always produce tight angles or very complex patterns, but the precision of wire EDM machines allows for complex patterns and cuts. Additionally, wire EDM can cut metal materials as thin as 0.004 inches and thicker than 16 inches. In routine cases, there may be thicker sections. At certain material thicknesses, wire EDM will vaporize the metal, removing potential debris. The wire in a WCEDM device sparks on all sides, meaning the kerf must be thicker than the wire itself. In other words, since the wire is surrounded by an electric current ring, the smallest and most precise cutting path may be the added diameter of the ring and the wire; technicians can easily interpret this added size. Manufacturers continue to produce thinner wires for smaller kerfs and higher precision.
Due to its versatility, manufacturers can use wire EDM machines for a wide range of applications. Because this process can cut very small workpieces, it is often ideal for producing small, high-precision parts that are usually too delicate for other machining schemes. Moreover, this process is cost-effective for producing small-batch projects, and it can also prove beneficial for prototype manufacturing even if actual projects are conducted differently. It is important to remember that the wire continuously moves during machining and cannot be reused. Therefore, copper, brass, or other metal wires can be miles long, increasing the process cost. Furthermore, although the process does not use any force and therefore does not produce burrs, making it suitable for fragile items, the possibility of thermal stress definitely exists. Most machining operations involving wire EDM start with roughing, which has a fairly fast feed rate and high dielectric constant. Continuous skim passes use smaller kerfs, reducing dielectric fluid flow to achieve a finished surface to tolerance. Reduced dielectric flow prevents the wire from deforming during these skim passes. Cuts that do not start along the part's edge (such as holes) require pre-drilling to allow the wire to pass through. Many wire EDM machines are equipped with electrodes for small hole drilling, allowing starter holes to be machined in hardened steel without using conventional drills. Small hole drilling usually uses an EDM electrode mounted on a rotating spindle, with the dielectric fluid pumped through the electrode to flush the hole. The process of using a separate EDM drill to create small holes in hardened materials is sometimes called splicing.
Compared to traditional EDM machining, the main advantage of wire edm machining services is that the continuous power supply minimizes wear on fixed electrodes. Wire EDM machines consume a significant amount of wire, which correspondingly increases the cost. Many wire EDM machines are self-threading, so even if the wire breaks, the entire machining process can continue almost uninterrupted.
Another major advantage is the ability to cut parts after heat treatment, eliminating the possibility of deformation caused by post-processing after machining. Additionally, because the wire EDM machining method does not apply any machining pressure to the workpiece, it is easy to machine small parts. Compared to traditional machining methods, the requirement for fixtures is minimal. Very fine surfaces can be machined.
In recent years, CNC machining has rapidly dominated the manufacturing industry due to its high precision and repeatability. With the multitude of CNC technologies available today, understanding the basics of CNC machining will help you distinguish their features. One of the innovative technologies is CNC turning.
It involves removing material from a rotating rigid workpiece using non-rotating cutting tools in a turning center or lathe. The CNC turning process can produce parts of different shapes and sizes depending on the type of turning operations. Although this concept seems quite simple, high-quality CNC turning can be very complex.
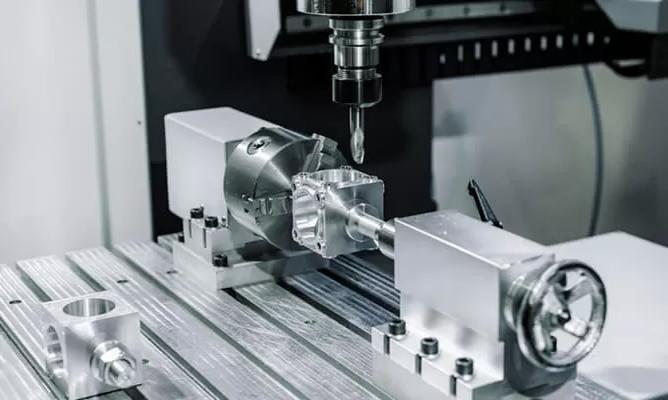
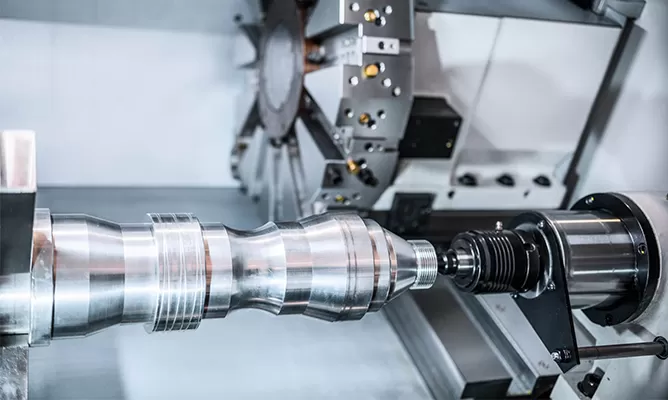
CNC turning is a high-precision, high-efficiency subtractive machining process that operates similarly to a lathe. It involves placing the cutting tool on the turning workpiece to remove material and achieve the desired shape. While the raw material rotates at high speed, the turning center or lathe remains fixed. When the workpiece rotates and moves along the dual CNC lathe axes, the single-point cutting tool helps shape the material. Computer programs help control the turning center or lathe, ensuring the production of extremely precise parts. People often confuse CNC turning and milling, but they are different processes. The precision cnc milling and most other subtractive CNC processes generally fix the workpiece on the machine bed, while using rotating tools to cut the material. In contrast, CNC turning uses the opposite process, where the workpiece rotates while the cutting tool remains stationary.
Due to its mode of operation, CNC turning is commonly used to produce cylindrical or oval-shaped parts. However, it can also create multiple axially symmetric shapes. These shapes include cones, disks, or a combination of shapes. Some turning centers even allow polygonal turning operations with special rotating tools, enabling the creation of hexagonal or square components.
CNC turning offers several benefits, including:
1. Accuracy
CNC lathes can perform precise measurements using CAD or CAM files and eliminate human errors. Whether for prototype production or completing an entire production cycle, experts can use advanced machinery to achieve incredibly high precision. Since the machines used are programmed, each cut is precise. In other words, the last piece in a production run is identical to the first piece.
2. Flexibility
Turning centers come in various sizes to meet the flexibility of your application. Adjustments are fairly easy because the machine's tasks are pre-programmed. Operators can complete your components by making necessary programming adjustments to your CAM program, or even build something entirely different. Hence, if you need many unique parts, you can rely on the same cnc precision machining service company.
3. Ensured Safety
Manufacturing companies adhere to strict safety regulations to ensure complete safety. As the lathe is automated, it requires less labor since operators are there only to monitor the machines. Likewise, the lathe body comes with fully enclosed or semi-enclosed protective devices to prevent scattered particles during processing, reducing harm to workers.
4. Faster Results
When performing programmed tasks on a CNC lathe or turning center, the chances of error are lower. Thus, the machine can complete production faster without sacrificing the quality of the final output. Eventually, you can receive the necessary components faster than with other options.
The CNC turning process can be quite complex. However, we will provide you with a simplified step-by-step breakdown from design to manufacturing. The general steps for cnc turning service are:
1. Convert CAD Design File to CNC Program
The first step involves preparing the CAD file to be translated into the CNC lathe language. This does not involve advanced programming. You must already have some 2D drawings of the design. In this case, you need to electronically capture these designs using software like AutoCAD or SolidWorks. Once you have the electronic design in CAD file format, you can convert it into a CAM program. You can also export the drawing in CAM format using the same software tools mentioned above. Then, manufacturing engineers can use the software to test the manufacturability of the component.
2. Prepare the CNC Lathe
The next step is machine setup. Although most of the process is automated, an operator is still required. To effectively prepare the CNC lathe, follow these steps:
Ensure the power is off. The CNC machining process can become very dangerous. Therefore, you should be extra cautious and check the power switch.
Secure the part to the chuck. The chuck is responsible for holding the part in place during the turning process. Incorrectly loading it can be dangerous and may result in incorrect component dimensions.
Load the tool turret. Turning operations involve multiple tools, so you must ensure to select the correct tool for the specific finishing. The turret helps hold as many tools as possible at once, allowing for seamless operations.
Ensure correct alignment. You must set the tool and workpiece correctly to ensure the results meet the requirements.
Upload the CNC program. The last step before starting the operation is to upload the CNC code into the machine.
At this stage, you need to keep two variables in mind. The first is the turning speed (the speed at which the workpiece rotates). The second variable is the feed rate (the speed at which the cutting tool moves along the rotating workpiece). Professional machinists must determine these values because incorrect estimations can affect the final result. Additionally, incorrect estimations for some materials may result in uneven surfaces or irreparable damage to the workpiece. That said, you can stick to low turning speeds and high feed rates for "roughing" the shape. On the other hand, high turning speeds coupled with lower feed rates are ideal for smooth surfaces and parts with precise tolerance requirements.
3. Manufacture CNC Turning Parts
The final step is to manufacture the parts you want. You can choose different turning operations depending on the results you wish to achieve. Furthermore, the complexity of the part will determine how many cycles you will have. Cycle time calculation will help you understand the total time spent on the component, which is crucial for cost estimation. Typically, turning cycle times include:
(1) Loading time. Although this is part of the setup, a cycle may require a different method of loading the workpiece onto the machine.
(2) Cutting time. This is the time required to cut the workpiece. Feed rate and cut depth are factors that influence cutting time.
(3) Idle time. Any operation that does not involve cutting is an idle operation. For example, changing the setup of the turning center, moving tools, etc.
The result of the manufacturing process will depend on the raw material used. Parts made from plastic will differ in functionality and surface roughness compared to those made from metal.
In the modern industrial field, precision manufacturing has become an important standard for measuring the strength of a brand. ANOK, as a company specializing in the research and sales of medical instrument parts, food equipment parts, motorcycle parts, agricultural equipment parts, industrial parts, communication parts, aviation parts, automation equipment, molds, plastic products, precision mechanical parts, lathe parts and accessories, always focuses on precision manufacturing services and is committed to providing high-quality products and services to retailers, e-commerce, wholesalers, distributors, supermarkets, and trading companies.
Precision manufacturing is not just a technical term; it is also ANOK's core competitiveness. We fully understand that in modern industry, the level of precision manufacturing directly determines the quality and performance of products. ANOK has an experienced R&D team and advanced production equipment capable of processing and manufacturing at the micron level of precision.
Our automation equipment and assembly line equipment use the most advanced control systems and sensing technologies to ensure each component reaches the highest precision and consistency. Whether it is the design and manufacturing of molds or the forming and processing of plastic products, ANOK strives for excellence to meet the various needs of customers.
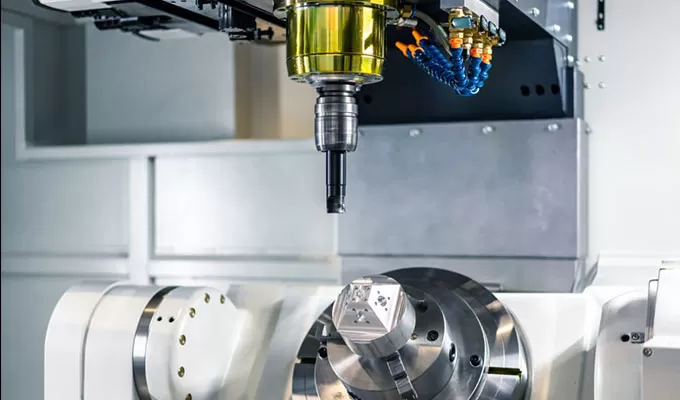
In the process of precision manufacturing, the performance and accuracy of machine tools are critical. As one of leading and professional custom machining manufacturers, ANOK has introduced world-class efficient machine tool equipment, including CNC lathes, milling machines, and grinding machines, ensuring that each component can be processed to the highest precision and quality.
Our machine tool equipment not only features high precision and high efficiency but also can process complex shapes and difficult-to-machine materials. Whether it's turning or milling metal parts, or forming and processing plastic products, ANOK can, through efficient machine tool equipment, ensure that every detail of the product is flawless.
Milling is an indispensable part of precision manufacturing, and ANOK also excels in this field. Our milling equipment uses the most advanced CNC technology, enabling high-precision and high-efficiency processing. Whether it is complex geometric shapes or high-hardness materials, ANOK's precision cnc milling equipment can handle it with ease.
Through precision milling technology, ANOK can provide customers with high-quality precision mechanical parts, mechanical plates, lathe parts, and accessories. These products not only feature high precision and high strength but can also maintain stable performance and long-lasting service life in various complex working environments.
CNC machining has revolutionized manufacturing by providing high precision and accuracy in the production of parts and components. However, even the most precisely manufactured parts are susceptible to corrosion, wear, and other environmental factors. This is where surface treatments come in—they help protect CNC machined parts from damage and extend their service life. In this article, we will introduce some of the most commonly used surface treatment solutions for CNC machined parts.
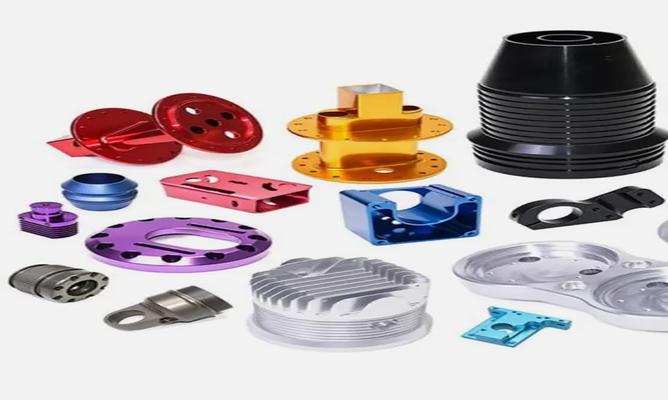
Anodizing is a process that uses an electrolytic solution to form a protective oxide layer on the surface of a part. This layer provides excellent corrosion resistance and enhanced wear resistance. Anodizing can be done in various colors, making it an attractive choice for decorative applications.
As one of precision manufacturing services, Electroplating involves depositing a thin layer of metal on the surface of a part. Electroplating can be done with various metals, including chrome, nickel, copper, and gold. This surface treatment provides excellent corrosion resistance, as well as improved conductivity and aesthetics. Powder coating involves applying a dry powder to the surface of a part and then heating it to form a hard and durable coating. Powder coating offers excellent corrosion resistance, weather resistance, and wear resistance. It can also be done in various colors, making it an attractive choice for decorative applications. PVD coating is a product of Physical Vapor Deposition technology. This technique involves vaporizing the surface of a material source (solid or liquid) into gaseous atoms or molecules, or partially ionized into ions, under vacuum conditions, and then depositing thin films with specific functions on the substrate surface.
Chemical conversion coatings involve forming a thin chemically bonded layer on the surface of a part. This layer provides excellent corrosion resistance and improved adhesion for subsequent painting or other surface treatments. Common types of chemical conversion coatings include chromate and phosphate coatings.
Heat treatment involves subjecting parts to high temperatures to alter their properties. This can include hardening, tempering, and annealing. Heat treatment can improve the strength, durability, and wear resistance of parts.
Laser marking involves using a laser to create permanent high-contrast marks on the surface of a part. Laser marking can be used for both functional and decorative purposes and can be performed on various materials.
In conclusion, there are various surface treatments available for CNC machined parts to enhance their durability, corrosion resistance, and aesthetics. Anodizing, electroplating, powder coating, chemical conversion coatings, heat treatment, and laser marking are common surface treatments that can help extend the life of CNC machined parts. By choosing the right surface treatment for your application, you can ensure that CNC machined parts are protected and perform their intended functions for years to come. Welcome to choose ANOK as your reliable and professional precision machining manufacturer.